

Overview
This guide shows you how to explore the API Portal interface and test one of the APIs (in this case, the Student-API endpoint) directly from the sandbox — no code or external tools required.
Step 1: Navigate to the API
- Log in to the Developer Portal.
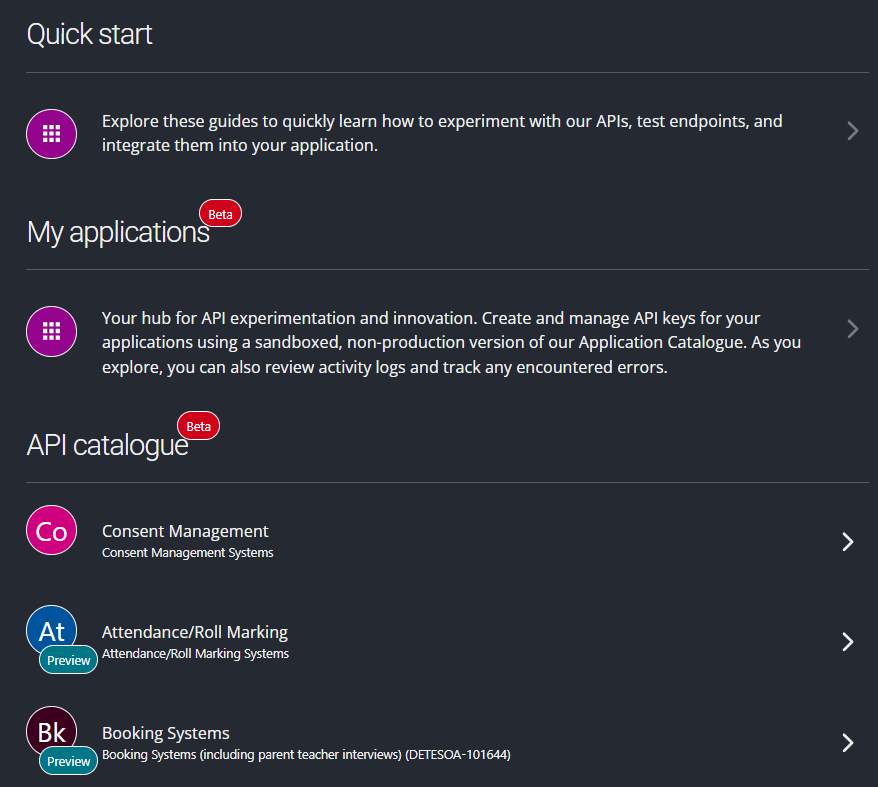
- Go to the API Catalogue. You will see the following sections:
- Quick start – Guides to help you learn about the API sandbox
- My applications – Create and manage application keys and view activity logs
- API catalogue – APIs exposed by DataHub for Department systems
- QTeachers catalogue – APIs exposed by the QTeachers system
[add screenshot]
- Select one of the system/product groups, e.g., Consent Management.
- You will see a list of API groups and their endpoints. You can download the API specifications by clicking the download icon.
- Locate and click the Student-API group and select the endpoint:
GET/student-api/schools/{zoneId}/studentpersonals
This will take you to the API portal, where you can test the endpoint.
Step 2: Explore the portal interface
The portal interface is divided into several sections:
- Endpoint – Displays the API group name, HTTP verb, and endpoint path
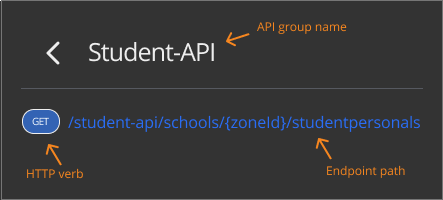
- Model – Shows the data model in JSON format
- Request – Displays input parameters and includes Clear and Execute buttons
- Response – Displays the response from the API in JSON format
Step 3: Explore the model
Expand the Model section to see the structure of the StudentPersonal object returned by this API.
Example schema:
{
  "StudentPersonal": [
    {
      "LocalId": "string",
      "StateProvinceId": "string",
      "OtherIdList": [
        {
          "Type": "string",
          "Value": "string"
        }
      ],
      "PersonInfo": {
        "Name": {
          "Type": "string",
          "FamilyName": "string",
          "GivenName": "string",
          "PreferredFamilyName": "string",
          "PreferredGivenName": "string",
          "FullName": "string"
        },
        "Demographics": {
          "BirthDate": "string"
        }
      },
      "MostRecent": {
        "SchoolLocalId": "string",
        "YearLevel": {
          "Code": "string"
        },
        "Homegroup": "string"
      },
      "SIF_ExtendedElements": [
        {
          "Name": "string",
          "Text": [
            {}
          ]
        }
      ],
      "IndependentStudent": "string",
      "MedicalCondition": "string",
      "Indigenous": "string"
    }
  ]
}
Understanding the model helps you know what data to expect in the response.
Step 4: Provide input parameters
Scroll to the Request section. You will see a list of input parameters such as:
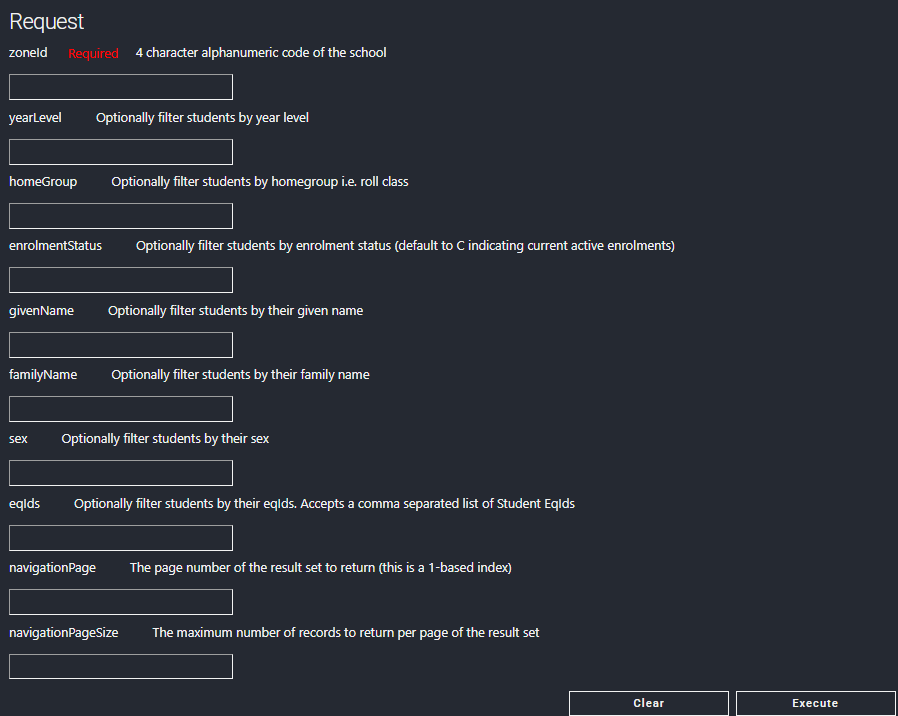
Enter the required fields (e.g., zoneId = 434972). Optional fields can be left empty unless you want to filter results.
Step 5: Execute the request
Scroll to the Response section. You will see:
- Click Clear to reset any previous input.
- Click Execute to send the request.
The portal will call the API in real time.
Step 6: View the response
Scroll to the Response section. You will see:
- Status code – e.g., 200 OK means the request was successful
- Response body – The JSON data returned by the API
Example response:
{
  "StudentPersonal": [
    {
      "LocalId": "590529",
      "StateProvinceId": "QLD",
      "OtherIdList": [
        {
          "Type": "TFN",
          "Value": "416665353"
        }
      ],
      "PersonInfo": {
        "Name": {
          "Type": "A",
          "FamilyName": "Kuvalis",
          "GivenName": "John",
          "PreferredFamilyName": "Kihn",
          "PreferredGivenName": "Seamus",
          "FullName": "Adriana Romaguera"
        },
        "Demographics": {
          "BirthDate": "2021-09-08T04:07:47.303Z"
        }
      },
      "MostRecent": {
        "SchoolLocalId": "358588",
        "YearLevel": {
          "code": "7",
          "description": "Year 3"
        },
        "Homegroup": "Simpsons"
      },
      "SIF_ExtendedElements": [
        {
          "Name": "0360669844",
          "Text": [
            "Some sample text..."
          ]
        }
      ],
      "IndependentStudent": "Y",
      "MedicalCondition": "N",
      "Indigenous": "Y"
    }
  ]
}
Next steps
Once you have successfully tested the API in the portal, you can:
- Experiment with different parameters – Try different
zoneId,yearLevel, andhomeGroupvalues to explore responses. - Test other endpoints – Explore additional API groups in the portal and understand their models and parameters.
- Integrate into your application – Use the input parameters and response format as a guide to integrate the API in your code or Postman collections.
- Save and share requests – Document the request and response examples for your team.
- Apply for live credentials – Once your testing is complete, request security credentials to interact with live Department systems.
- Monitor and troubleshoot – Review API responses carefully to handle errors, missing data, or permission issues.
